

A Simple Guide to Passing Data between Activities in Android


In Android development, it’s common to have multiple activities that work together to make up a complete app.
Sometimes, you’ll need to pass data between these activities.
In this guide, we’ll show you how to do that with a simple example.
We’ll create an app that allows the user to enter their name on the first screen and then displays a welcome message with their name on the second screen.
Step 1: Create a new project
First, create a new Android Studio project. Choose a blank activity for the main activity.
Step 2: Design the user interface
Next, design the user interface for the main activity. We’ll use a text field for the user to enter their name and a button to submit the name.
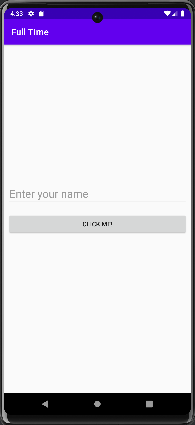
Main Activity
Here’s the XML code for the activity_main.xml layout file:
<RelativeLayout xmlns:android="http://schemas.android.com/apk/res/android"
    xmlns:tools="http://schemas.android.com/tools"
    android:layout_width="match_parent"
    android:layout_height="match_parent"
    tools:context=".MainActivity">

    <TextView
        android:id="@+id/textView"
        android:layout_width="wrap_content"
        android:layout_height="wrap_content"
        android:layout_centerHorizontal="true"
        android:layout_marginTop="50dp"
        android:text="Enter your name:"
        android:textSize="20sp" />

    <EditText
        android:id="@+id/nameTxt"
        android:layout_width="wrap_content"
        android:layout_height="wrap_content"
        android:layout_below="@+id/textView"
        android:layout_centerHorizontal="true"
        android:layout_marginTop="20dp"
        android:ems="10"
        android:hint="Name" />

    <Button
        android:id="@+id/button1"
        android:layout_width="wrap_content"
        android:layout_height="wrap_content"
        android:layout_below="@+id/nameTxt"
        android:layout_centerHorizontal="true"
        android:layout_marginTop="20dp"
        android:text="Click me" />

</RelativeLayout>
Step 3: Handle the button click
In the MainActivity class, we’ll handle the button click and pass the entered name to the second activity.
Here’s the Java code for the MainActivity class:
public class MainActivity extends AppCompatActivity {

   private Button clickMeBtn;
   private TextView nameTxtBox;
   private TextView textViewLbl;

    @SuppressLint("MissingInflatedId")
    @Override
    protected void onCreate(Bundle savedInstanceState) {
        super.onCreate(savedInstanceState);
        setContentView(R.layout.activity_main);

        clickMeBtn=findViewById(R.id.button1);
        nameTxtBox=findViewById(R.id.nameTxt);
        textViewLbl=findViewById(R.id.textView);

        clickMeBtn.setOnClickListener(new View.OnClickListener() {
            @Override
            public void onClick(View view) {
                String nameStr;
                nameStr=nameTxtBox.getText().toString();

                textViewLbl.setText(nameStr);

                Intent intent=new Intent(MainActivity.this,SecondActivity.class);
                intent.putExtra("Message", nameStr);
                startActivity(intent);
            }
        });
    }

}
We get the entered name from the nameTxtBox and store it in a String variable nameStr.
Then we create an Intent object and pass the nameStr as an extra with the key “Message”.
Finally, we start the second activity with the startActivity() method.
Step 4: Design the second activity
Next, design the user interface for the second activity. We’ll use a text view to display the welcome message.
Here’s the Java code for the Second Activity class:
package com.example.fulltime;

import android.support.v7.app.AppCompatActivity;
import android.os.Bundle;
import android.widget.TextView;

public class SecondActivity extends AppCompatActivity {

    private TextView display;

    @Override
    protected void onCreate(Bundle savedInstanceState) {
        super.onCreate(savedInstanceState);
        setContentView(R.layout.activity_second);

        display=findViewById(R.id.textView2);
        String textMessage=getIntent().getStringExtra("Message");
        display.setText(textMessage);
    }
}
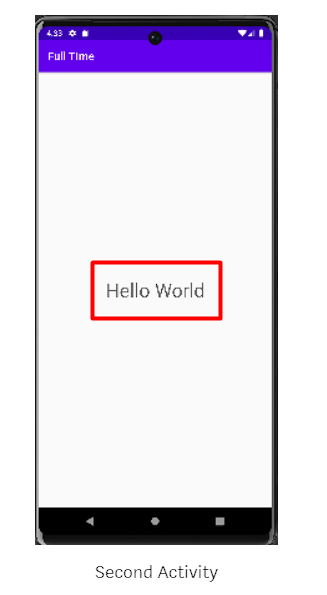
Second Activity
Step 5: Retrieving Data from the Intent in the Second Activity
To retrieve the data that was passed from the first activity, we need to use the getIntent() method to get the Intent object that started the activity and then use the getStringExtra() method to extract the string value associated with the key "Message".
// Retrieve the message passed from the first activity
String textMessage = getIntent().getStringExtra("Message");

// Set the message in the TextView
display.setText(textMessage);
We can then display this string in the TextView.
Step 6: Running the App
Now that we have completed writing the code, we can run the app on an emulator or a physical device to see how it works.
When the app is launched, the user is presented with a screen that has a textbox to enter their name and a button to submit the name.
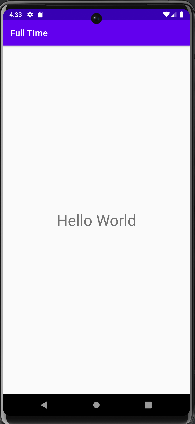
Once the user clicks the button, the name is displayed on the screen, and the user is taken to a new activity where the name is displayed again.
By following these simple steps, we have created a basic Android app that allows the user to enter their name and display it on the screen.
We have also learned how to pass data between activities using intents, which is an essential concept in Android app development.
In conclusion, this guide has provided a simple introduction to building an Android app that can receive user input and display it on the screen using intents.
By understanding these concepts, you can start building more complex apps that incorporate multiple activities and user interactions.